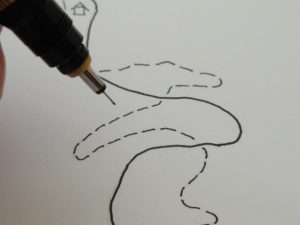
Both the Chantry Flat – Mt. Wilson Trails and Trails of Wrightwood – Big Pines maps were drawn by hand using Rapidograph pens. Back in the mid 1980’s, while at Humboldt State University, we cartography students used this style of mechanical pen to draw maps. India ink was laid down on heavy Bristol paper. I was a geography major way before the advent of the internet and mapping was, for the most part, still in the realm of the analog world. Hand-drawn maps were to put it mildly, a myopic event. Back then, we had to pass a drafting exam before being hired on to draw maps.
My first job out of college was with Thomas Bros. Maps in Irvine. Back in 1986, we were tracing changes to roads that were picked up by air photos. These photos were positive transparencies that allowed light to pass through them when placed on big light tables. Our job as cartographic drafters was to manually draw in the changes on large mylar panels, making them “print-ready” for creating updated street atlases. Thomas Bros. Maps is now long-gone, passing with the advent of the digital age and especially apps such as Google Maps. You just might still have an old dusty spiral-bound Thomas Guide hidden under the seat of the car. If you’re over 40, you’ll likely remember these map books. See: Madeleine Brand Show KPCC 89.3

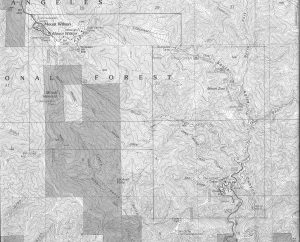
Now, fast forward twenty-five years later. After working 24 years as a camp manager, 20 of them at Sturtevant Camp in the Big Santa Anita Canyon, I had not much as even looked at my old drafting supplies mothballed in an old cardboard box. I had some time on my hands during 2011 and it suddenly hit me that it’d be fun to draw a map of the hiking trails in the Big Santa Anita Canyon. I bought a drawing table and cleaned out the dried ink in my old Rapidographs. The first map to be made was going to be of the trails in and around Chantry Flats above Arcadia. So, how to do this? Using an older (1995) Mt. Wilson U.S.G.S. 7 1/2 minute topographic map for a base to work off of was the first step. The topo map provided an accurate image to base my project on, especially with the benchmarks as a basis for creating a framework to draw within. Next, I made a clear mylar grid which was laid over the “topo” map. The grid created 1″x 1″ squares that were photocopied over sections of the topo map to make working copies to take out into the field. It was in comparing the differences between the hiking trails shown on the U.S.G.S. Mount Wilson quadrangle with what was actually out in the field that became the heart of the project. I’d draw in the changes on the enlarged topo map sections with a vermilion colored art pencil. At home, a large sheet of Bristol drawing paper was overlaid with a 6″x 6″ grid to draw within, greatly increasing the scale of what was being drawn off my field copies. Basically, this age old practice of mechanically increasing the scale of a map while maintaining proportion provided room to draw.
Even though I had grown up hiking around Chantry Flats and thought I had
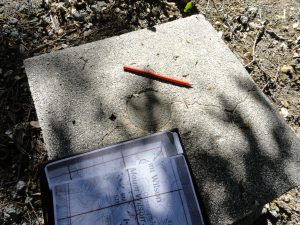
much of the terrain in my mind, drawing in the changes while out on the trails made it all look amazingly new. What I thought I knew about these canyons while hiking over the years was one thing. Then stopping to draw it was quite another! Usually the pattern was drawing in a small section of realigned trail, erasing it and drawing it back in, again, until it was right. Occasional drops of sweat dripping off the end of my nose, deer flies and low light levels intervened with endless erasing on the clipboard. By now, you’ve got to be wondering why I didn’t just set way points with a GPS… As of this writing, I still don’t carry a GPS (global positioning device) while out hiking. It’s not that I don’t see the value in plotting where one’s been while hiking, running or biking. When there’s a time constraint or desire to gauge your progress, then by all means, GPS is a great tool. Keeping an orienteering compass as a back-up isn’t a bad idea either. Likely, as in any choices we make, what we actually end up doing comes down to a matter of preference.
Drawing, for me, has always been a slow, almost meditative process. The use
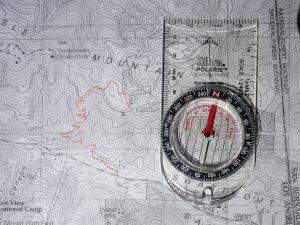
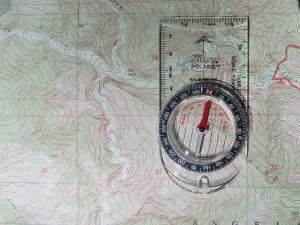
of map and compass while out in the mountains happens to be the route that works best for my head. Using a compass along with a topographic quadrangle really helps me to settle into the landscape. Taking the time to pour over the placement of contour lines in depicting the shape and steepness of a mountainside helps with focus and developing a sense of place. Taking the time to orient the map to true north adds orientation, putting the image on the map right with the rest of the good earth. Taking time to ponder your next move, especially when traveling x-country up a wild canyon or walking single-track trail, adds to a sense of presence of where you are, absorbing the magic of the place. This isn’t a fast activity. Hiking and drawing like this is slow art.
So, back to creating the maps. After all the trails, roads, streams, benchmarks, campsites, scale bar, neat line, legend and other cultural features were drawn in, it was time to digitize the images. The inked paper maps were ran through a roller scanner at a resolution of 300 dpi. These originals are quite big, about 30″ x 40″ in size. Once scanned and saved to a flash drive, the black and white map image along with subsequent ones, would be available for editing with a basic PhotoShop program. At home, I attached a graphics tablet to my laptop and began the process of nearly endless editing, colorizing and repairing of goofs. What I thought in the beginning would take a few weeks turned into months before it was time to print. The last map drawn, Trails of Wrightwood – Big Pines, took about seven months from start to finish. In the beginning, the maps were printed on text paper, yet fell apart way too soon after just a few hikes. Currently, the maps are being printed on synthetic map paper made from recycled plastics.
The end result is an accurate easy-to-use larger scale map, allowing you to clearly see details along your hike. The Chantry Flat – Mt. Wilson Trails map is printed front and back with contour lines drawn at 200′ intervals. The Trails of Wrightwood – Big Pines map is printed on one side and covers a significantly larger area in the eastern San Gabriels.